

How to Fillet a Salmon
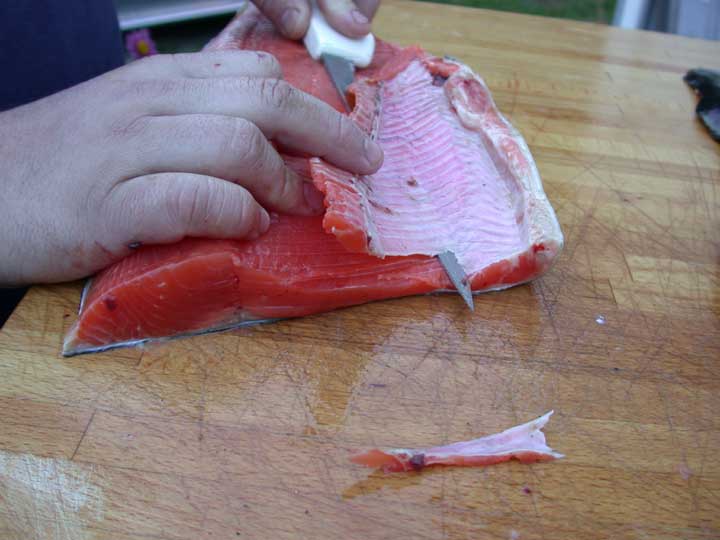
Because of the way I fillet (I cut through the rib bones and leave them on the fillets), I then need to go back and remove the ribs to have nice-looking, bone-free fillets. Again, I think fish placement is very important when cutting fish. For ribbing, I prefer to place my fillets with the bellies away from me, and at an angle. Make sure you have plenty of room and place the fish in a way that feels comfortable to you. The first thing to do is remove the first one or two ribs from the front of the fillet. Remove them with an angled cut of the knife. These ribs are positioned slightly different than the rest of the ribs and if you don’t remove them first, they cause problems in this next step.
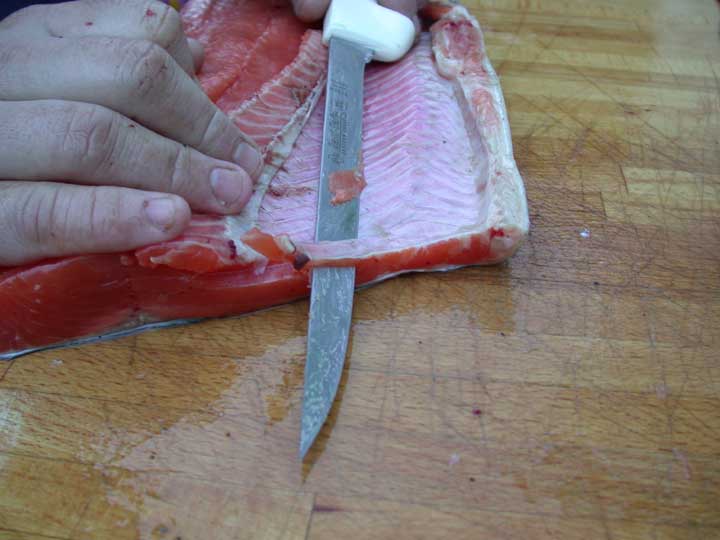
Starting near where the backbone used to be, cut just under the ribs. To do this easily takes a delicate touch. You want to angle the knife so it’s angled slightly up, towards the ribs, maximizing the amount of meat you leave on the fillet. You also want to put a little pressure down on the knife lengthwise, giving it a slight bend, so it follows the ribs more closely. This is where a true fillet knife comes in handy, because true fillet knives have the proper blade thickness that allows you to bend the blade with just the right pressure.
Continue to cut and lift the ribs out. You may leave a little bit of white belly lining in place, this is fine. You can either leave it (many people do) or trim it out later.
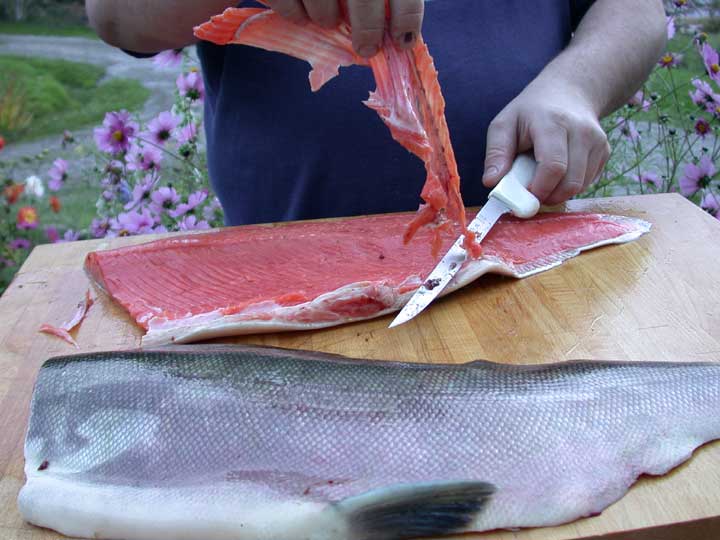
Completely detach the ribs and belly lining.

You may also be interested in ...

